Radio Install
2025-07-25
. category:
Bronco
.
Comments
#Bronco Comms
#Bronco Interior
 Here is the list of parts I used during this setup.
| Part | Installed |
|---|---|
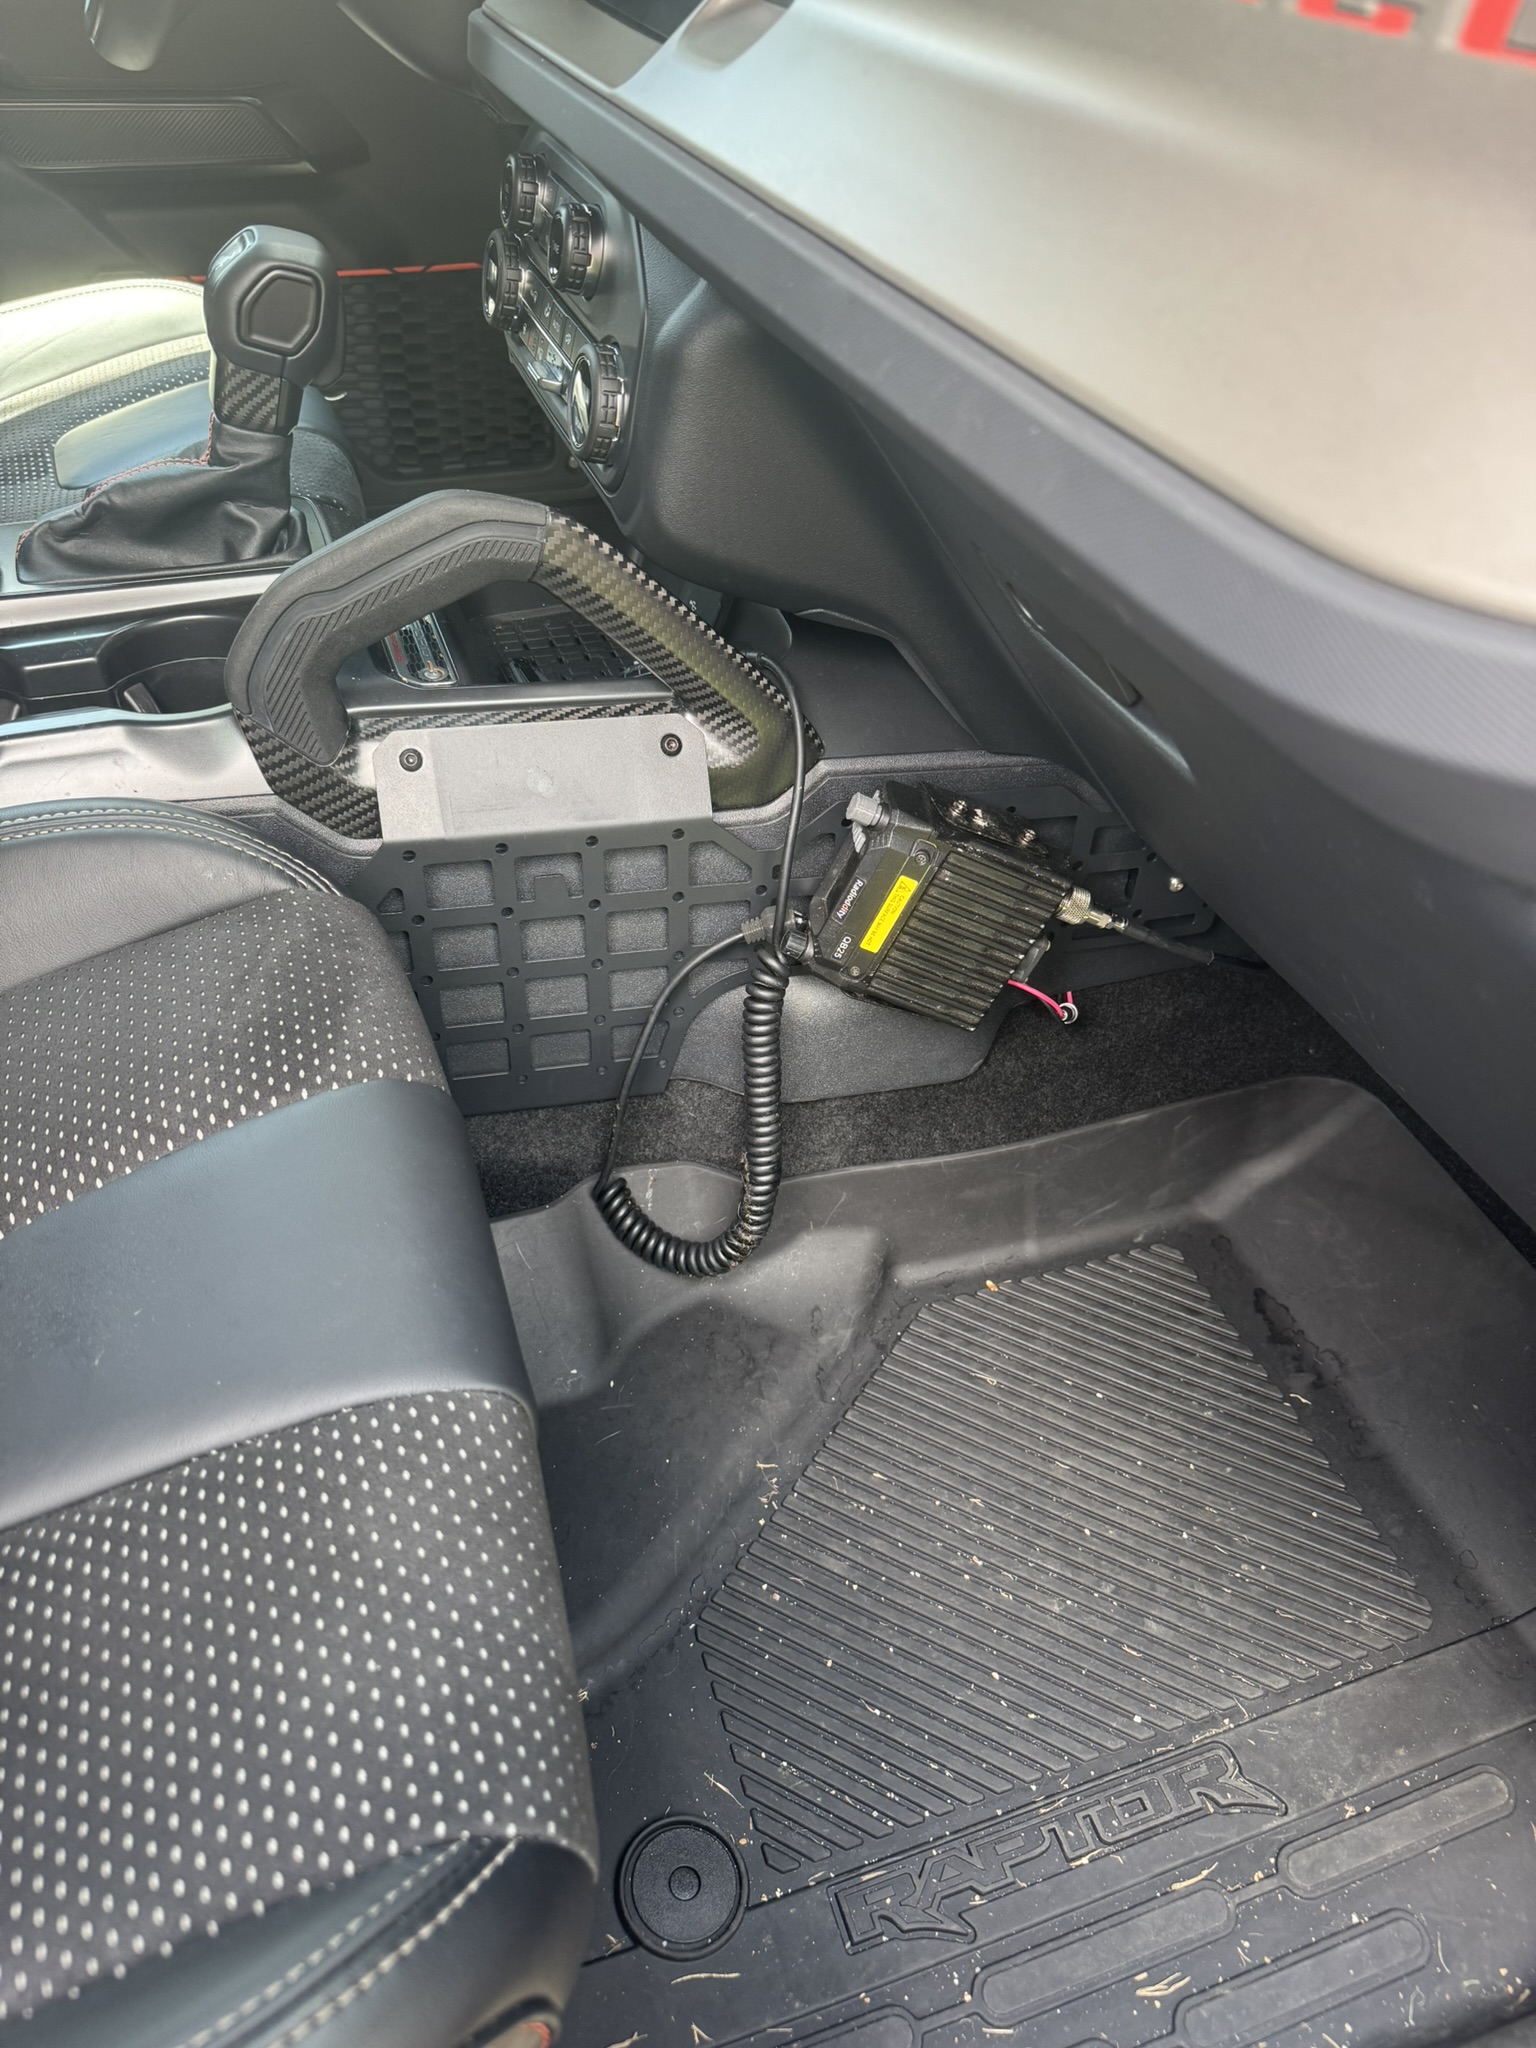
| Center Console Molle Panel-Passenger | 7/16/25 |
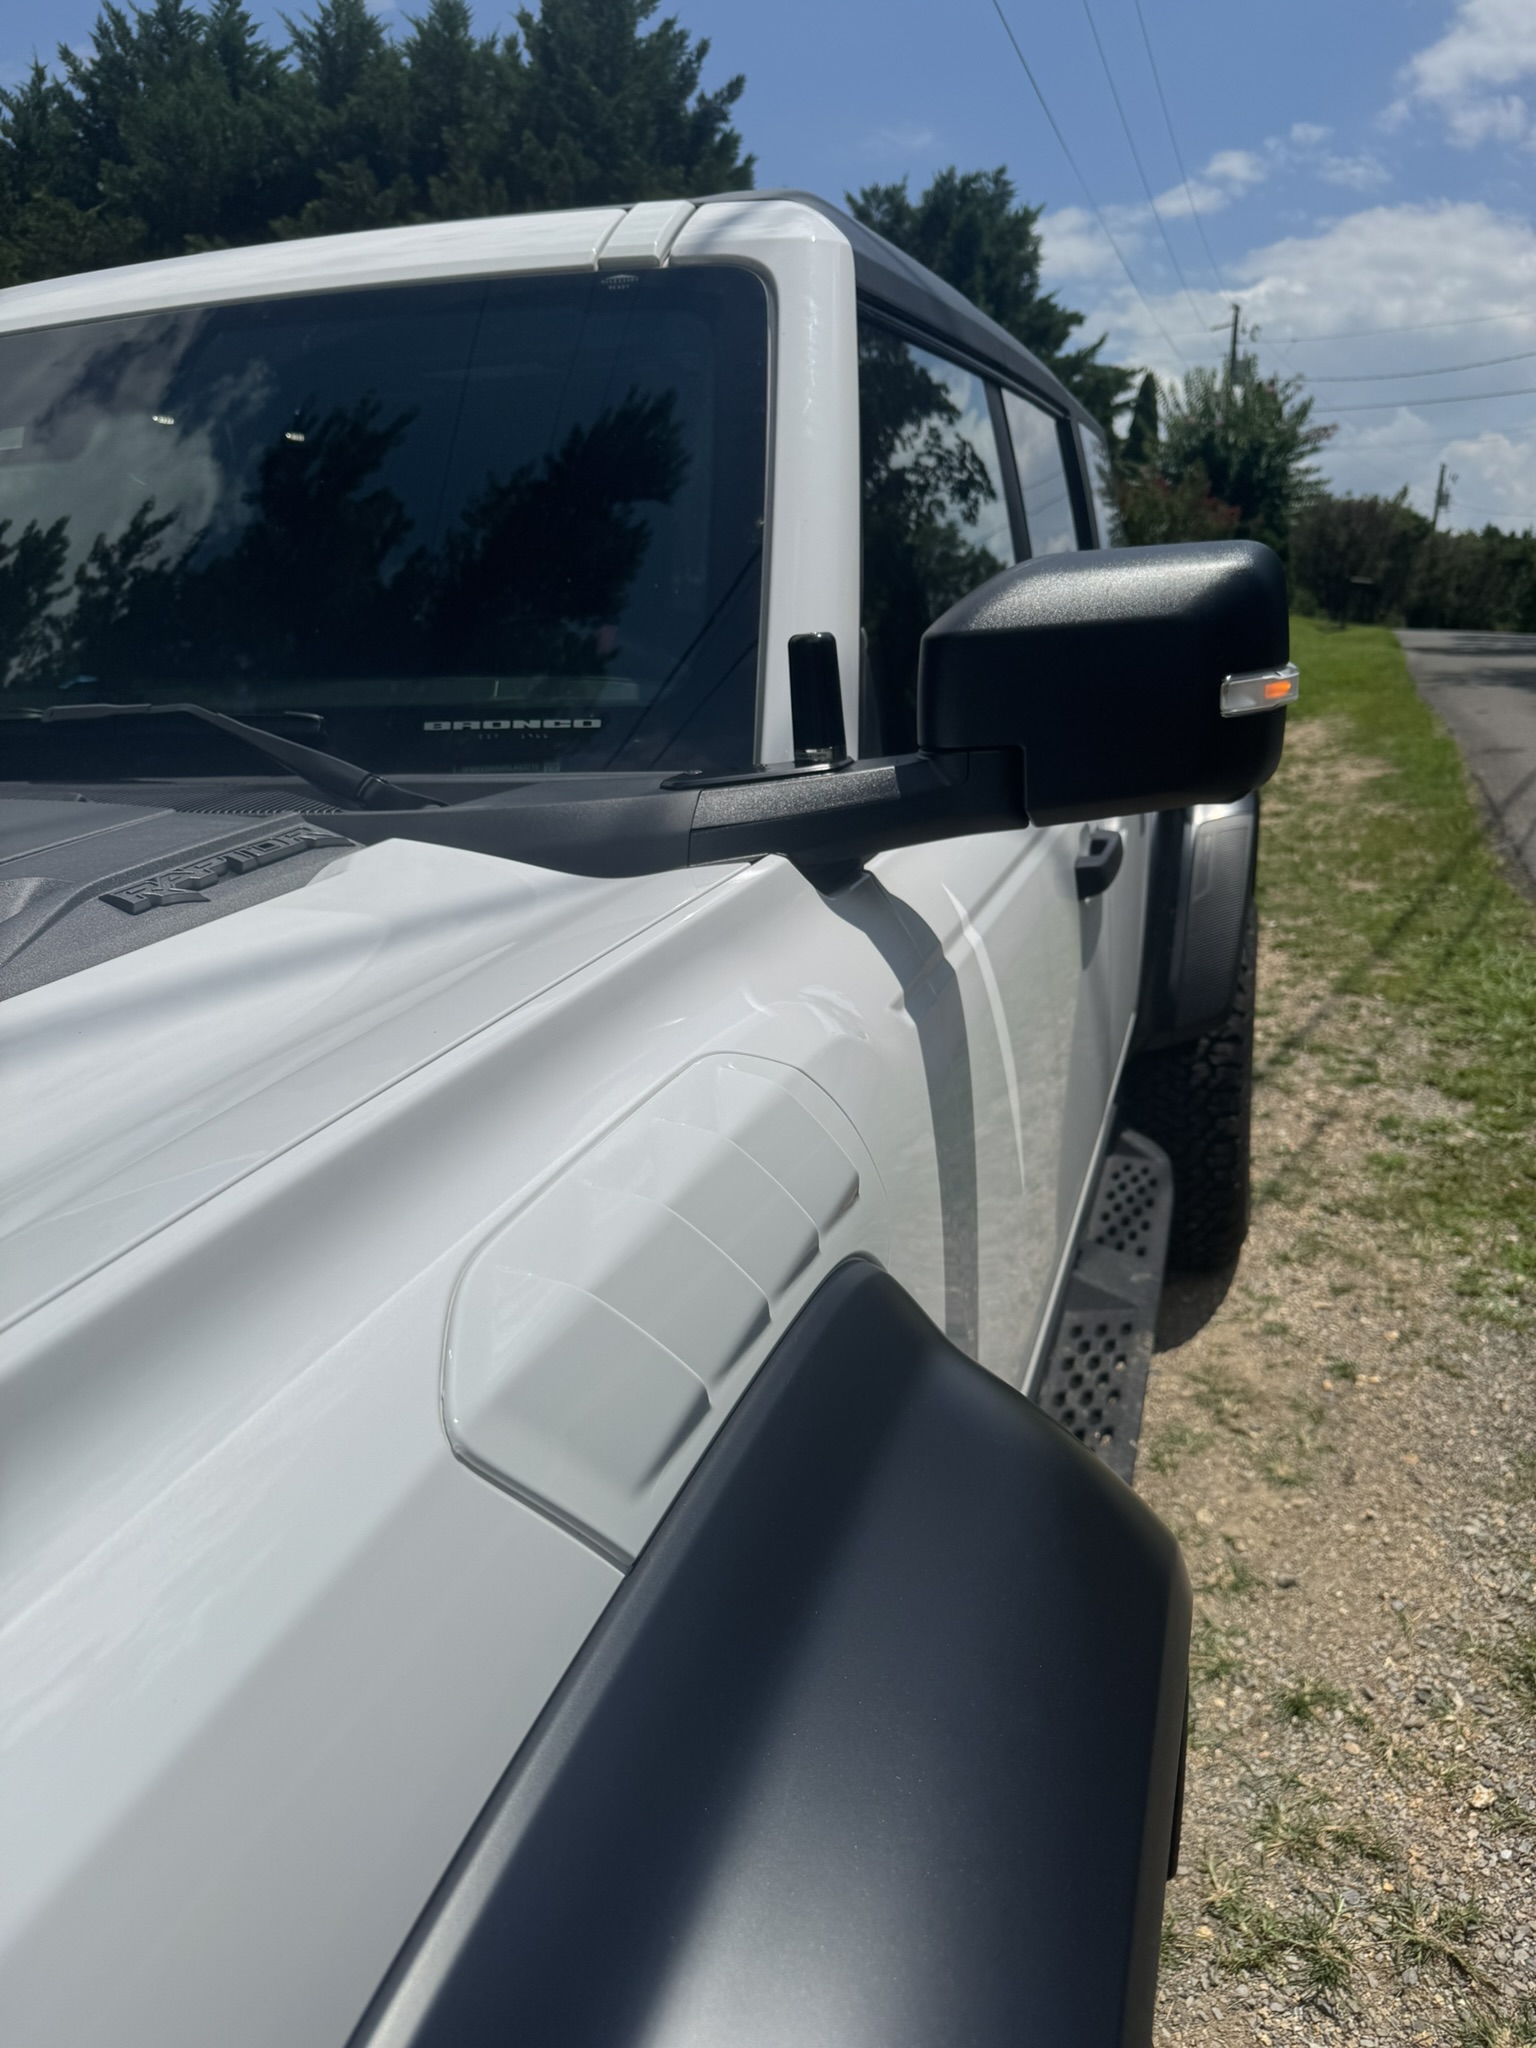
| Short Radio Antenna 7” | 7/9/25 |
| Antenna Mount | 7/16/25 |
| 3DB Gain GMRS NMO antenna vhf/uhf | 7/16/25 |
| NMO Antenna Cable with removable PL259 | 7/16/25 |
| Radioditty QB25 | 7/16/25 |
The Radioditty QB25 I have had, and was moved from another vehicle. All of the other parts are new. I chose a radio like this because I can use it for both GMRS and HAM. Because I chose the wrong antenna cable I had to module the antenna mount. If you pick the correct antenna mount and cable, this will be much easier. I ran power and antenna through rubber gromet on firewall near the top of driver side. I routed cables across to the other side of the vehicle. I mounted the radio to the center console molle panel. I was not able to use the stock screws on the passenger grab handle to mount the molle panel. The stock screws were to short. I replaced these with some black m6 allen head screws. I wired the radio to the Aux6 switch. I chose to run the power under the good instead of using the power wire behind the glove box. I thought I could save this wire for something else since I was already running an antenna wire. I am not 100% sold on the antenna. It seems to do fine on the 440 range, but 2m/144 range soes not seem to pick up as well. I will continue to evaluate but it may be replaced. I chagned the stock radio antenna to the short 7” antenna. This was a really simple install. All that has to be done was unscrew the stock and antenna and screw on the new one.

Mitch Tuck is a technologist. He has worked in various areas around technology. He has worked as both a developer and infrastructure on networks and servers. He enjoys technology in almost all forms.